Monday, October 31, 2011

Corned Beef Hash

Just in time for Sunday, well, OK, a little late for this Sunday breakfast idea, but still valid.
Corned Beef Hash
I've been on a voyage of discovery lately -
 in my freezer, and have been finding all kinds of foods, I froze thinking I could/would use them at a later date.

 I really hate to throw away a lot of it.  In fact I have a large container in the freezer right now labeled Stone Soup, I'll get to that in a later post though.   One of the items I uncovered was a small Corned Beef I'd made a few months ago, and really, it needed to be eaten.

So, I made us some Corned Beef Hash today.

Recipe: Corned Beef Hash
This makes about 4 servings.

1 small Corned Beef, (mine was just under a pound, cut into dice)
4 potatoes, cooked and cut into dice (this works very well with white or red potatoes)
1 onion, diced
1-2 tbsp. Worcestershire Sauce
Salt and Pepper, to taste

Cook potatoes,

dice and set aside.   I didn't have any cooked potatoes, so I hurried up and threw some in my handy dandy Ziploc cooking bag, threw them into the microwave for 7 minutes, then took them out and peeled them.   You can leave the peel on if you like, personally I like the peel.

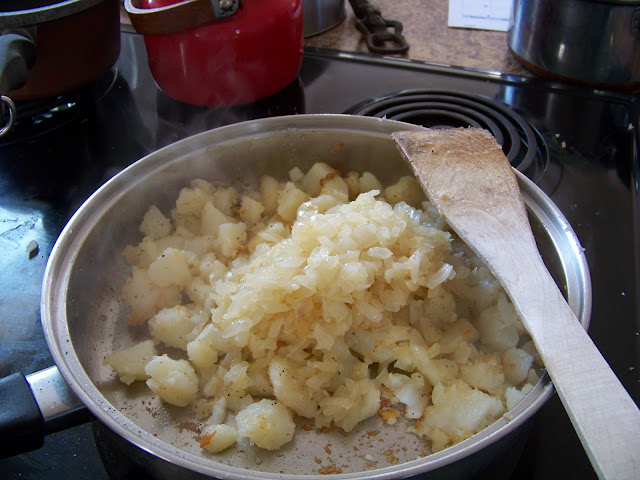
Cook the diced onion until translucent.   Set aside for a few minutes, while you brown the potatoes a little.
Then add them into the potatoes.
Potato's browning with some onions
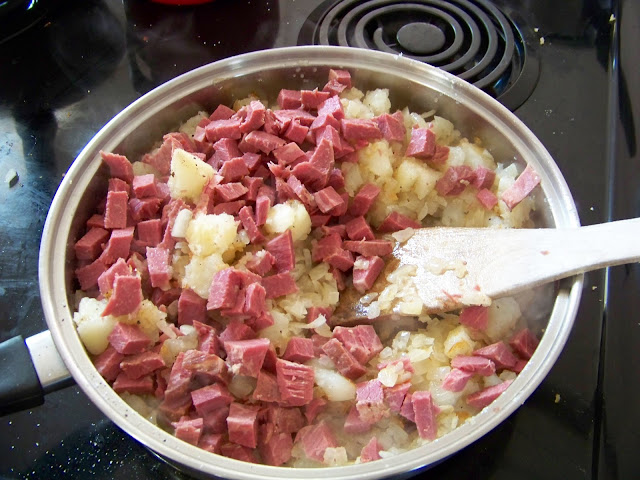
After they've had a chance to brown up a little and cook some more, then you add the diced corned beef to the pan.
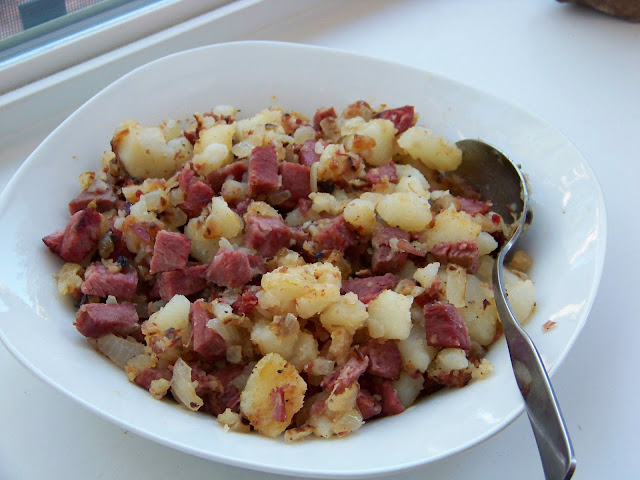
Corned Beef Hash

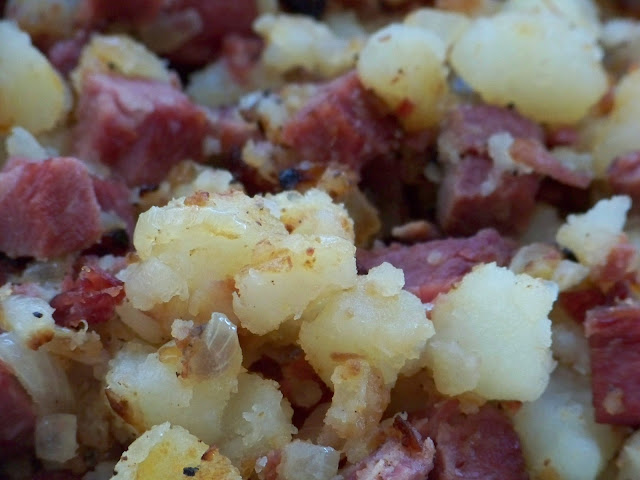
Let it cook together and get a good brown going.   The last minute or so of cooking, add some salt, pepper and drizzle about 1-2 tbsp. of Worcestershire sauce over the whole thing.   Stir it and serve.
Corned Beef Hash
Add a fried egg or two on top, and you have a hearty breakfast or a light dinner.   There was actually much more than we could eat at one go, so I froze the rest.   Another easy meal for me in the future.    This is one of those great recipes in that you can stretch it by adding a few more potatoes and another onion.   Never hurts to have something like this in your recipe arsenal.  
Continue Reading
No comments
Share:

Thursday, October 27, 2011

Mice and Crunchy Eyeballs

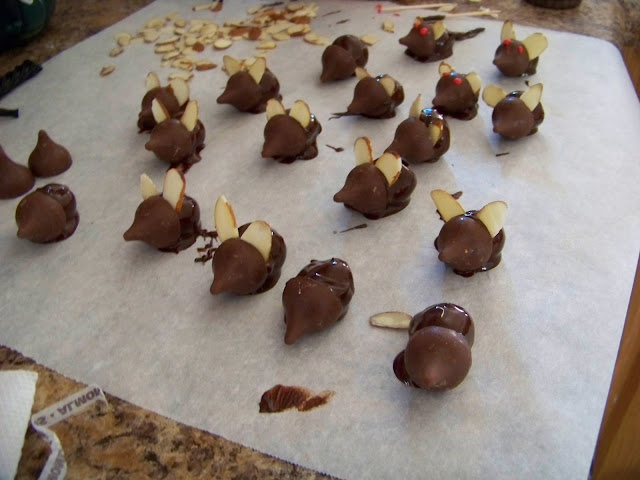
Last week at Tapa's I had a plate of 'Mice' set out that I'd thrown together for the party, and they were a HIT!!!  OK, so people liked them.     And one of our guests made them with her granddaughters and they took them to school.  Well, I met the granddaughters and they were very polite when introduced to me, and then their grandma told them I was the person who'd told her how to make the Mice, and the girls got very enthusiastic.   They had to tell me how much fun they'd had making them, and giving them away at school.   Made me feel good.
And these are as easy to make as can be.    Five ingredients, a little time, and Voila, MICE, edible ones.

1 jar Maraschino Cherries, with stems if possible (I couldn't find any and the licorice idea for tails didn't work)
Chocolate Chips for melting.
Hershey Kisses
Sliced Almonds
Red frosting in a tube

Drain a jar of Maraschino Cherries, reserving the juice if you like.   Rinse, then pat them dry on some paper towels.
Melt chocolate, and let sit for a couple of minutes, while you're unwrapping the Hershey Kisses.

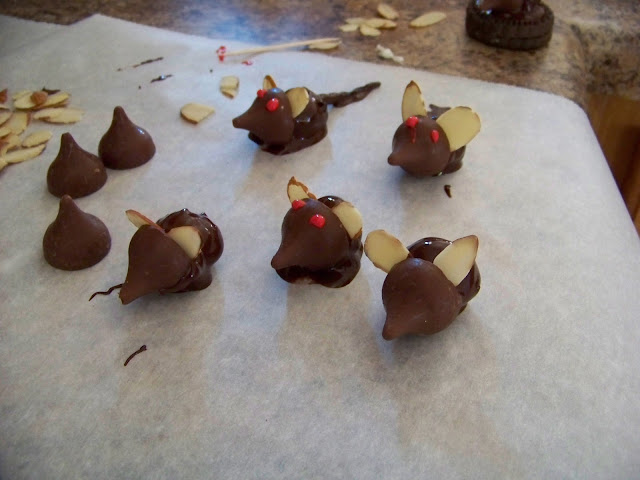
Dip a cherry into the chocolate, then place it against the base of a Hershey kiss, hold it there for just a second
Chocolate Kiss Mice

so that it adheres, then put two slices of the almonds in between the chocolate covered cherry and the Hershey Kiss.
Chocolate Kiss Mice

  Make eyes with the red frosting tube and set aside to cool.   (I forgot to take a good picture of my finished plate of mice, grrrrrr).   Repeat til all the mice are assembled and set aside to solidify.   Serve and enjoy.
Chocolate Kiss Mice and Crunchy Eyeballs


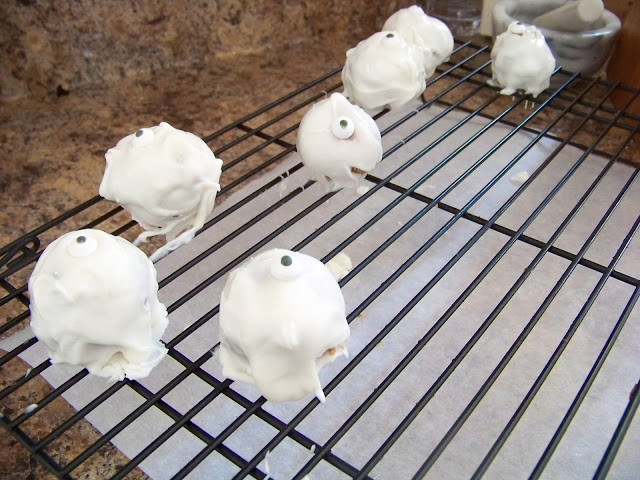
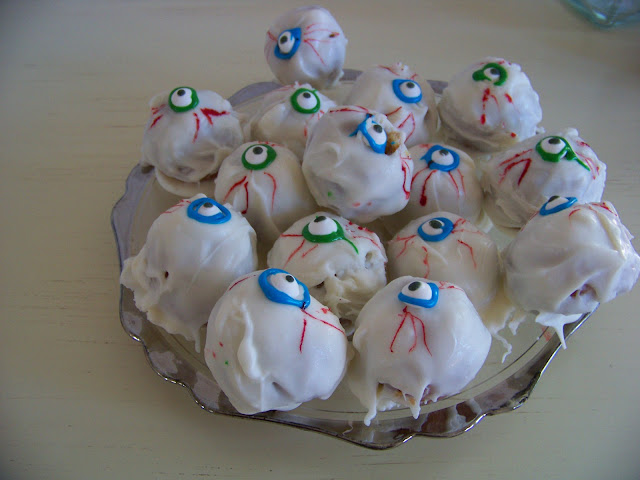
And as you can see I also made some 'Crunchy' Eyeballs as well.   Believe it or not, they were a hit with the grown ups there as well.
Again, something so easy to make and fun for the kid in all of us.
Doughnut holes
White chocolate chips, melted
blue or green M & M's or
Blue and Green frosting in a tube.
Red Food coloring

Crunchy Eyeballs
 Drop a little white chocolate on a piece of parchment paper, then position the doughnut hole on it. or you can also just dip the whole hole into the white chocolate.
Crunchy Eyeballs
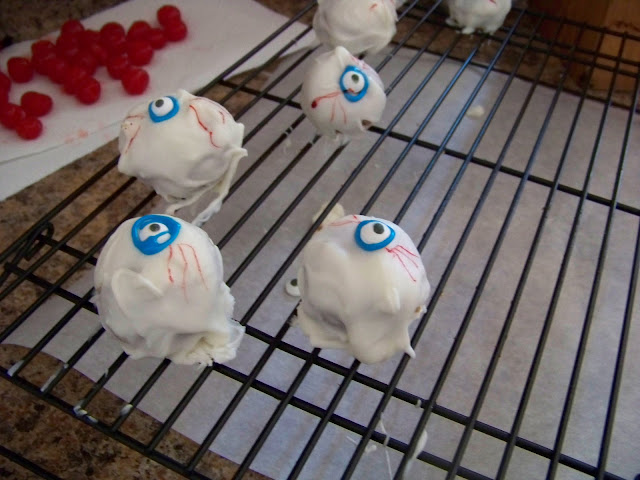
I had some 'eyeballs' I'd purchased at Walmart by Wiltons, and used them as the base,
Crunchy Eyeballs
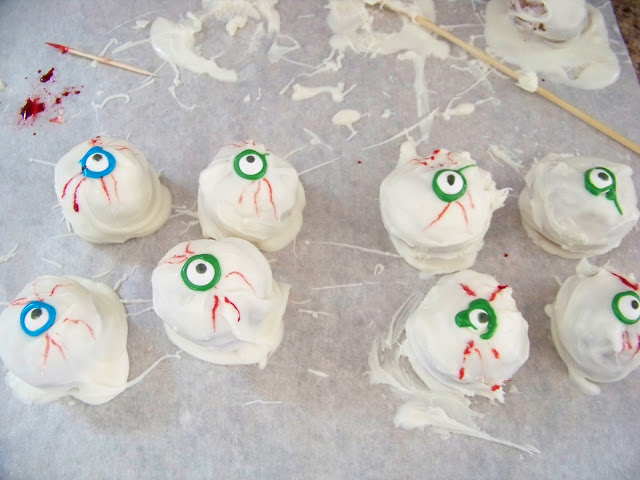
 Piped some blue and green frosting around the eyeball, and then finished them up with some red food coloring applied with a toothpick, to make them suitably bloody.
Crunchy Eyeballs

Crunchy Eyeballs


It's fun watching  grownups playing with their food.
Crunchy Eyeballs and Mice

Continue Reading
1 comment
Share:

Sunday, October 23, 2011

'Eyeball' Stew at October Tapa's Night


I love Halloween, the costumes, the food, getting dressed up, the kooky food, the interesting getups people wear.   Can you tell I'm torn between the food and the idea of being able to leave my 'grownupness' (is that a word?) behind, just for one day.   A day to play, and pretend and leave the adult cares behind.  sigh...

I've been collecting Halloween recipes for a long time, and every so often, well, once a year or so I get to drag out my recipes and make something 'spooky'.   I don't really like the gross stuff, of course if someone were to ask, I can give them some really cool recipes for the kids, I just don't make them myself.  And let's face it, kids love the gross stuff.   As an adult I like the to emphasize the fun factor much more in the food I prepare.    

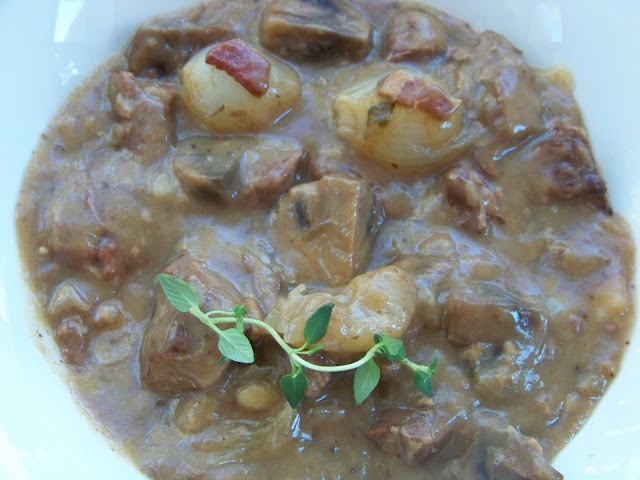
I make this recipe, Beef Bourignon throughout the year, but when I make it for Halloween it gets renamed.   Eyeball Stew sounds so much more ominous. *giggle*
Beef Bourignon

But it's also really, really good.   I got the original recipe out of the Active Woman's Cook book from Avon (one of the first cook books I ever bought, the first year I was married and I'm not saying how many years that's been), and have been making it ever since.   Then about ten years ago I made it for a Halloween potluck, renamed it Eyeball Stew, and now I make it every year.   The pearl onions can resemble 'eyes', and the bacon if you leave it in strips can be whatever your imagination tells you it is.   I leave it up to you.   You can serve this with some plain steamed rice on the side.
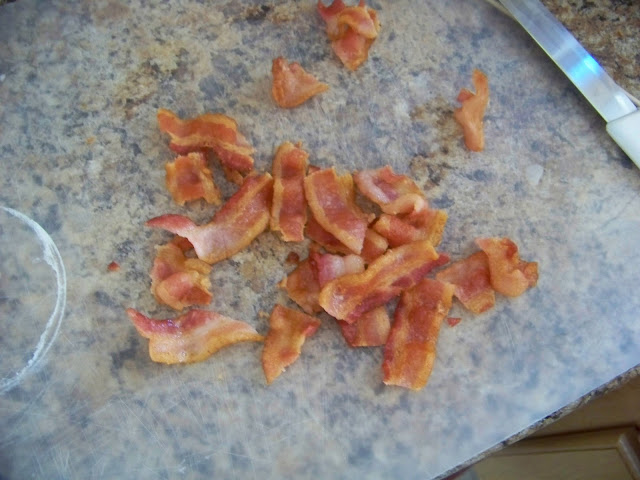
Bacon

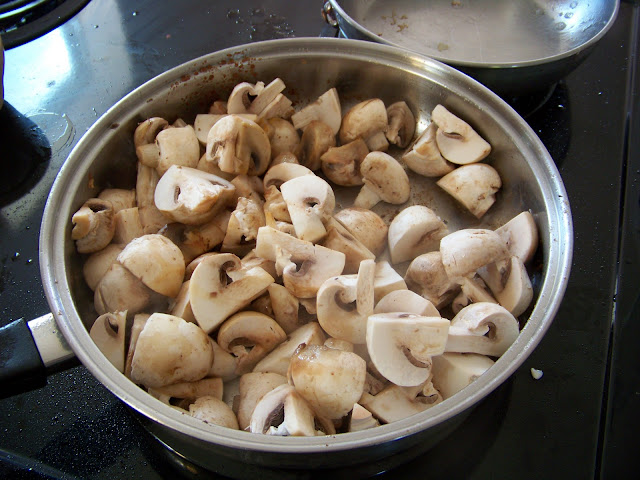
Mushrooms
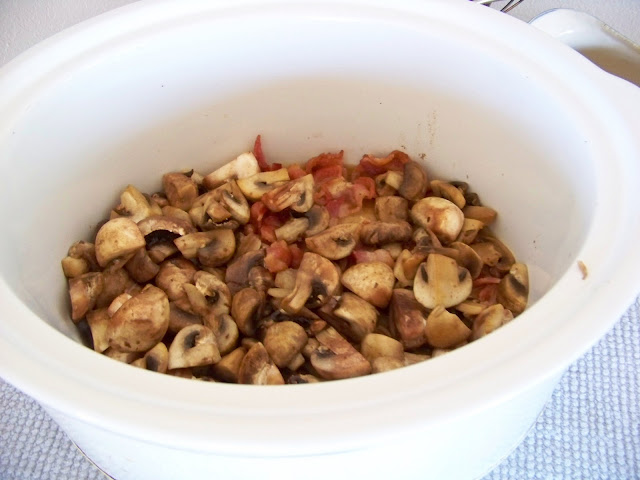
Mushrooms and Bacon for Stew
Beef Bourignon ready to cook

Eyeball Stew (Beef Bourignon)

2-4 lbs. Lean Stew Meat
6 slices bacon, cut in quarters
1 lb. fresh mushrooms, cut into quarters
1 large onion, cut into chunks
2-4 sprigs fresh thyme
1 lb. white pearl onions, peeled (you can also do a mixture of red and white pearl onions)
1 pkg.  McCormicks Au Jus Mix and 4 cups of water or 4 cups beef stock
2 tbsp. Flour and 1/2 cup water mixed together
Salt and Pepper to taste

Fry the bacon until done, semi-crisp, remove, reserving the fat.  Place the bacon in a large pot or crockpot.   Take some of the bacon fat out of the pan and reserve it.   Saute the mushrooms a little, and remove from the fry pan and add to the pot with the bacon.   Brown the meat in the reserved bacon fat, a little at a time, you want a nice brown to the meat, and by adding a little of the meat at a time you can do this, crowding the pot will result in grey looking meat.   As the meat browns, add it to the pot with the bacon and mushrooms.  Cut up the onion and add it to the pot as well.   When all the meat has browned and is in the pot add the thyme sprigs and the water and Au Jus mix or the beef stock.   Cover and let simmer for at least 2 hours until the meat is tender.   In the last half hour of cooking time, add the peeled pearl onions.   Cutting a little cross in the stem end of the onions, will help to keep them whole.   The onion you added earlier will have cooked out and become part of the gravy.    When the meat is tender, thicken it with a slurry made of 2 tbsp. flour and half cup of water.   Serve with rice   (for Halloween you can call the rice "Lice" if you like.  Can also be served with wide buttered noodles (Intestines?) or potatoes.  Or just have some nice Crusty bread available for dipping. Which is what I did this time.   And it got et.  Well, people were going back for seconds, so it must have tasted good. 

So as usual, we had all kinds of food, and lots of costumes.     I apologize for the quality of the pictures, it's entirely the photographers fault.  She was having too much fun visiting and stuff.  
Baked Pasta dish and Apple Crisp

Bloody Eyeballs and Mice

Mediterranean Eggplant (sorry for the blur)

Crab Dip, Chicken Fingers, Salad, Stew at the back.

Tuna sandwiches

East Indies style Pumpkin Soup

Pickled Beans

Meatballs

Stuffed Jalapenos
 
And as for the costumes, we had several witches, a lady from India, complete with a gorgeous sari, a gentleman dressed as an Arab, a Devil, Wonderwoman, a Gypsy seer, and more.
It was fun.  

Continue Reading
No comments
Share:

Friday, October 21, 2011

Sunday 'Gravy' with Braciole

I've said it before and will most likely say it again - probably many times - we really have some incredibly talented cooks in our neck of the woods, and the best part they love to share their skills and abilities with the rest of us.

This week was the monthly guest chef cooking demonstration at the Crooked River Grill Restaurant.   We had an Italian Sunday Dinner with Jeff Ilardi showing us how to make Braciole -  a key component of Sunday 'Gravy', a sunday dinner staple in many Italian homes.

I want to just interject a note here, one of the fun aspects of the monthly cooking demo's is the quiz that begins the demonstration, I've included a picture of that, as well as the front of the recipe packet we get.
Always fun to see how much you know.


Here's the Chef
I'm so thrilled, I finally have a recipe for 'Gravy', one that I've tasted so I know how it's supposed to taste, that is - I can now try making it on my own.   And it's the perfect recipe to add to my arsenal of cooler weather recipes,  now that we're heading into cooler weather, relatively speaking that is, I do live in Florida after all.
Here's a few pictures of Jeff showing us how to make, roll and saute the Braciole, before it goes into the 'Gravy' to finish cooking.   The recipe for both follow.
Mallet to pound the round steak with.
Showing us how thick the steak should be.
The wonderful mallet Jeff is using belonged to his father who was a butcher.   The mallet is formed from a knot from an oak tree.   There is something special about using something to cook with that your father made and used.   I know I loved using the wooden spoon my dad made for my mom during my cooking demonstration.    I loved the continuity of using a utensil that had been used by my mom as well as the fact it had been made by my dad.
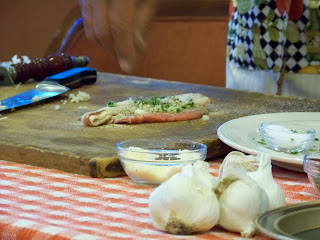
Chopping garlic, look at the flying knife.
Chopped parsley and garlic
Parsley, bread crumbs and bacon, ready to roll up.
Rolled up and waiting to be tied.
Browned and ready to be put into the gravy
We started off the meal with an Insalata
Gravy waiting to be dished up
Doesn't this look good?
Dessert was Cannoli, Cream Puffs and Tiramisu (which I didn't get a picture of)

Sunday 'Gravy'
Makes 3-4 quarts
6 mild Italian Sausages, cut in thirds
1/2 large Onion, finely chopped
2 cloves Garlic, minced
1 (5oz) Can of Tomato Paste
1/2 cup dry Red Wine
3 (28 oz.) cans quality imported whole Italian Plum Tomatoes (San Marzano are the best, but be sure to use imported Italian tomatoes)
2-3 Tbsp. of equal parts of Basil, Thyme, Sage and Oregano dried herbs.  Double the amount if using fresh herbs.
1/4 cup Rye Whiskey (optional)
1/2 cup extra virgin Olive Oil

Heat olive oil in a heavy-bottomed 6 quart pot, brown sausages on all sides.  Add onion and garlic and saute until just soft.    Don't burn the garlic.   Stir in tomato paste and cook gently 15-20 minutes being careful not to burn or have mixture stick to pot.   (Non stick pot works well).   Deglaze pot with the red wine and reduce out alcohol.

Process in blender the tomatoes with their liquid until slightly chunky and puree like.   Add tomatoes to the pot and bring to a simmer.    Stir in seasonings and herbs.  Adjust to taste, especially the salt.   Add whiskey if using.   This will cut acidity and make a slightly sweeter 'gravy'.   Simmer partially covered for about 3 hours, stirring occasionally.

'Gravy' can be made in advance.  Remove excess fats and oils by skimming during cooking or refrigerating.  Serve over pasta with meats.   Gravy can be kept refrigerated for 5 days or so, and can be used to make other dishes such as veal or chicken parmesan, or any tomato sauce based dish.

Braciole
Serves 6 as part of Sunday 'gravy'

2 slices of round steak 1/2 inch thick pounded to about 1/4 inch thick
2 slices of bacon
Mixture of:
2 tbsp. each:  Chopped Flat Leaf Parsley, Bread crumbs, Grated Parmesan cheese.   Add 1 clove finely minced Garlic and Salt and Pepper to taste.   This mixture should total about 1/2 cup.
String for tying
Extra Virgin Olive Oil for browning

To make
Lay 1 strip bacon on each braciole, sprinkle cheese mixture evenly over braciole, roll up and tie securely with string.   Heat oil in skillet and brown meat evenly on all sides.   Transfer to the simmering 'gravy' and cook at least 2 hours.  

Continue Reading
No comments
Share:

Tuesday, October 18, 2011

Southwest Casserole

I love potlucks, covered dish socials, or generally any kind of get together where people bring food.    Mostly, because those kinds of functions mean people are generally in a good mood, and the food choices that people bring is always an adventure.   In our area we are limited in our choices of restaurants, but that doesn't mean we can't have good food.    We have monthly potlucks and there are some totally awesome cooks who bring a large variety of dishes, which makes for some really good eating.

Southwest Casserole fixins
A few months ago I made a Southwest Casserole for a potluck, and had people begging me for the recipe.   It's one I got from my sister and in fact is one that both of my sisters make on a regular basis.   It's easy to put together, it freezes well, and most people like it.


Browned Beef with Onions, Pepper, Spinach and Tomato
Salsa and Tomato Sauce added
Assembly time, notice the nice neat squares of Tortillas
Cheese added, ready to go back into the oven for another 10 minutes

I had to laugh a couple of years ago, when I was visiting with them, my oldest sister had everyone over for dinner and pulled one of these out of the freezer and my other sister brought one as well, that she'd made and that was in her freezer.   Between the two casseroles, there was more than enough food for all of us.   It was one of those great minds think alike moments.  (Did I mention I'm a big fan of my sisters and my brother as well? All of them are great cooks.)

Gitte’s Southwest Casserole

1 ½ lbs ground beef
1 small onion, chopped
1 garlic clove, crushed and minced
1 ½ cups salsa   (use your favorite brand, or make your own)
8 oz can tomato sauce (you can also use El Pato Mexican Tomato sauce here, it adds a little heat).
1 tbsp. lime juice
2 med. Tomatoes, diced
1 ½ tsp. salt  (optional, I rarely use salt when cooking and in fact there is enough salt in the salsa to make up for omitting it.)
1 large red pepper, chopped
1 cup sour cream
¾ c cheddar, shredded
¾ c Monterey jack, shredded (I use grated colbyjack cheese, it works well here)
½ cup sliced black olives
10 oz. frozen spinach, thawed and drained
12 flour tortillas
(I also add a couple of minced jalapeno's for some extra heat)
Keep in the freezer for a busy day casserole.

Preparation Instructions

Brown meat over medium heat with the onions and garlic. Once the meat is browned and the onions are softened, remove from heat and drain the grease.
Add salsa, spinach, tomato sauce, tomatoes, bell pepper, lime juice and salt. Simmer uncovered for 15 minutes, stirring occasionally.
Arrange 6 tortillas **  on bottom and up sides of a lightly greased 13 x 9 baking dish, overlapping as necessary. Top with half of the meat mixture. Arrange the remaining tortillas over the meat mixture, overlapping as necessary. Spread sour cream evenly over tortillas, top with remaining meat mixture.

Bake in a 350F oven for 30 minutes or until hot and bubbly. Remove from oven and sprinkle with cheeses. Pop back in oven for about 20 minutes. Then remove it from the oven and let stand 10 minutes.

Cut into squares to serve. Garnish with olives, some sour cream and sliced green onions.
** I find that if I cut the tortillas into squares first, they’re a lot easier to serve, especially at pot lucks.

Continue Reading
No comments
Share: