Monday, September 25, 2017

Tarteletter shells (Cream Cheese Tart Shells)

According to many recipe books in Denmark there are over 100 different filling for Tarteletter.  I usually make one kind, this one.  It's the one my mom made, and signals a special occasion for me. But you need to be able to serve this on or in a tart shell.  A quick and easy fix for many of us is to use puff pastry shells, and serve it that way and that's not a bad thing.
If you live in Denmark you can head down to the local købmand's and pick up a package of tart shells.
You can also have them shipped in and that works great as well. If you can find some online.
Filled Tarteletter shells

However, if you're me, and like to play with food, this is also another option. 
It's a basic pastry dough, made with cream cheese, and is light, flaky and flavorful.
Cream Cheese Tart Shells for Tarteletter
It's also very easy to use, very forgiving and you can change it up a little if you're not in the mood for savory, you can also add a little sugar to it along with some vanilla extract and serve fresh fruit and whipped cream inside as well, or whatever you like.

I served this to my guests this past weekend.   
Cream Cheese Tart Shells for Tarteletter with filling


Yield: 36-40 mini tart shells

Tarteletter Shells
Cream Cheese Tart Shells for Tarteletter

prep time: 10 MINScook time: 10 MINStotal time: 20 mins
These are a perfect size for an appetizer, but can also be made larger for a meal. Add a little sugar and vanilla and they're also suitable for a dessert.

INGREDIENTS:


  • 4 oz. Cream Cheese
  • 4 oz. Butter
  • 2 cups AP flour
If making it sweet
  • 1 tablespoon sugar
  • 1 tsp. Vanilla Extract

INSTRUCTIONS:


  1. Mix the cream cheese and butter together. Then add the flour and mix well. Make into a ball, and place in fridge for an hour to cool down. Preheat oven to 375 degrees. When ready to make the tart shells, take out of fridge, divide the dough into two pieces. Take each portion of dough, sprinkle a little flour onto the counter, then roll out the dough thinly. Using a round cookie cutter, cut a round out that is larger than the tart shell, and press into the tart shell. Continue to cut out rounds and place them into the mini tart pan until it is full. Prick the bottom of each mini tart, with a fork. Bake in a 375 deg. oven for 7-10 minutes or until the tart shell is lightly browned. Remove from oven, and place on a rack to cool. Fill with your choice of fillings.
Created using The Recipes Generator

All recipes and their respective images are either original or adapted and credited, and are all the sole property of Sid's Sea Palm Cooking © 2011-2020, with all rights reserved thereof.

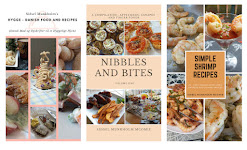
This recipe and many more Danish Recipes are in my cookbook Hygge- Danish Food and Recipes Dansk Mad og Opskrifter til et Hyggeligt Hjemme, available on Amazon. Also available as an ebook.

Continue Reading
No comments
Share:

Sunday, September 24, 2017

Tapas for September 2017

It never fails, I miss getting a photo of one of the dishes that was brought and shared at Tapas. The shot I missed was of some Shrimp Fried Rice. sigh.
One of these days, I'll actually get a picture of every single dish and then I'll probably faint in amazement.
Just kidding.
It was Tapas Time last night and we had some great dishes that were brought and shared.  Including one that came directly out of my cookbook, which I released last month. 
I get such a kick out of it when someone makes something from a recipe I've shared and then tells me all about it. Including whether they actually liked it or not or the changes they made to it.  As I tell people all the time, if you're making it, the recipe that is, then you're the cook.
But onward to the dishes.  And as usual I'll share what I made at the end.  This is Sildsalat, on page 43 of the cookbook.
Sildsalat
I put out a plate of buttered rye bread to go with it.

Harriett also brought a Zucchini salad
And then there was a Sausage and potato dish.
We had an interesting Pasta Dish which was seasoned with a little cinnamon.

Personally I love these little rollups, and generally end up eating several.  When I attempt them, they never look so neat. sigh
There were some yummy stuffed mini peppers. 
and some stuffed eggs
There was also some wild hog chili, which was very interesting
some more stuffed eggs and a fruit platter
I made some California Rolls and also some crab and cream cheese sushi rolls.
and some quick pickled carrots, ginger and radishes to go with them.
I also had fun making some Tartelletter with Chicken and Mushroom filling.  I made the tarts using a cream cheese pastry and I'll be sharing the how to's on that another time.  Not quite authentic, but very tasty.
I also made a Danish Crab Salad and placed it in some puff pastry shells to serve.  You might even say I made Crab Salad Tarteletter.  I'll be sharing that recipe soon, cause it's worth sharing.
There were a few desserts as well.  Pineapple
And some Nutella Fudge, and I'll be sharing that recipe soon, just as soon as I get a jar of Nutella and make it. 
There was a frozen trifle  Frangelica flavored I believe.  It was gone by the time I made it over to the dessert table.
We also had some Pumpkin Spice bars
And the obligatory shot of the table, and you can't see it, but the candle was lit.  Pierre and Jacque standing guard over the candle.  I also put out some Smoked Oysters, cause I like smoked oysters.
 We have more good food here.
I do have to tell a funny story though. 
In retrospect it was funny, but not at the time.
I'd run out of wasabi for the California Rolls, so had to make a last minute run to town to pick some up.  I got home with it, decided to slice off a piece of sushi to taste, and I put a good half teaspoonful of wasabi on top of my sushi, along with some sweet soy sauce. Popped it into my mouth, started to chew and swallow when the Wasabi hit.  And it hit back, just as I was swallowing.  Not only did my eyes water, my nose did as well.  Talk about self inflicted pain.   And yet, I did have some of the California Roll later on, I just put a teensy dab of Wasabi on it. That'll larn me to do some judicious taste testing in the future.  BTW, I bought not just one tube of Wasabi, but also a second one.   I've got plans for them, big plans.
Sushi anyone?

Continue Reading
No comments
Share:

Wednesday, September 20, 2017

Honey and Garlic Roasted Carrots

Honey and Garlic Roasted Carrots
I've got a lot of carrots in my fridge right now.  I bought some 'heirloom' carrots awhile back, there were not only a couple of orange carrots in the package, but also some white, yellow and purple or red carrots.
I put some of them out with a dip last month at Tapas, used some in soup, but I've still got some left
I also picked up some regular old orange ones for a Danish recipe I'll be posting in the next couple of days.
Then I was reminded of the Fantastical Food Fight Challenge for this month.  Make something with Honey and post it, since it's National Honey Month.
The recipe has to be new to the blog, which let out my Honey Mustard Dipping Sauce.  And with all the carrots in the fridge, needing, wanting to be used up, I thought maybe I could roast them.  And if I can roast them, I can also use a touch of honey and garlic to really bring out the sweetness of the carrots.
I was right.
These were so good, and pardon me fellow Danes, but they also went well with Stegt Flaesk,  although I didn't make the usual potatoes and parsley sauce that usually go with it.
And did I mention that they're pretty much guilt free?  Little oil, a little sweetness and totally over the top YUM.
Honey and Garlic Roasted Carrots

Honey and Garlic Roasted Carrots

Honey and Garlic Roasted Carrots

*****
I shared the recipe over at Miz Helen's Country Cottage and was awarded the coveted Red Plate. 
I believe this is the third time I've gotten one.  What a charge.


Yield: 2 servings

Honey and Garlic Roasted Carrots

prep time: 10 MINScook time: 20 MINStotal time: 30 mins
This takes plain old roasted carrots to a whole new level. The hint of garlic and honey sweetens the carrots even more.

INGREDIENTS:


  • 1 lb. Carrots, peeled and quartered lengthwise
  • 1/4 cup honey
  • 1 clove garlic, peeled and shaved
  • 1-2 teaspoons Extra Virgin Olive Oil
  • 1-2 tablespoons water
  • Salt (optional)

INSTRUCTIONS:


  1. Preheat the oven to 475 degrees. Place a rimmed baking pan into the oven and heat for 5 minutes or so. Peel the carrots and cut them in half and then into quarters lengthwise, keeping them roughly equal in size. Place into a dish and pour the olive oil over top, toss to coat. Peel a clove of garlic and shave it into 1/4 cup of honey, heat until the honey is liquid, about 20-30 seconds in the microwave, set aside. Place onto the heated baking sheet and bake for ten minutes, checking after the ten minutes, and turning the carrots, so they can cook evenly. Take out of oven and sprinkle with the 2 tablespoons of water and place back in oven for an additional 5-7 minutes or until the water mostly evaporates. The carrots should be tender to the fork. If they are, turn the oven off. Pour the honey and garlic over the carrots and place back into the oven for a couple more minutes.
Created using The Recipes Generator

Continue Reading
24 comments
Share:

Monday, September 18, 2017

Pear and Almond Tart

Confession time:  I screwed up the original recipe but it still came out tasting fantastic.   I forgot to add the butter to the filling, but honestly, I didn't miss it.
I got a gracious plenty of pears from a friend, and as they were ripening, I was eating them, but I did manage to save out a few for this  really awesome tart.
Pear and Almond Tart
I'm actually tempted to go and buy some more pears just so I can make it again.  I'm also wondering how well apples would go in this? hmmm, something to think about.
As you might have heard, I'm Danish and I like to bake, a lot.  I keep almond paste on hand all the time.
In fact I'm not too sure just how much I have in the pantry right now, but I'm sure if I had enough pears I could make quite a few of these tarts.
Rolling out the dough, just a little
Into the tart pan
 Pressing the dough out, evenly, up the sides.
Sliced Pears, arranged on top of dough.
 The filling poured over top. (without the added butter, sigh)

and finally...


Yield: 6-8 Servings

Pear and Almond Tart

prep time: 1 hour and 30 MINScook time: 50 MINStotal time: 1 hours and 80 mins
This is perfect if you have a glut of pears, or just because.

INGREDIENTS:

Crust
  • 2 large egg yolks
  • 2 tablespoons apple cider
  • 1 1/4 cups AP flour
  • 2 tablespoons sugar
  • 1/2 teaspoon salt (omit if using salted butter)
  • 9 tablespoons unsalted butter, cut into cubes.
Filling
  • 1/2 cup almond paste (packed, about 5 oz.)
  • 1/4 cup sugar
  • 1/4 cup AP flour
  • 4 tablespoons unsalted butter, room temp
  • 2 large eggs
  • 1/2 teaspoon vanilla extract
  • 4 medium Bartlett or Anjou pears, peeled and sliced

INSTRUCTIONS:


  1. For the Crust: Whisk the egg yolks and apple cider together. Then in the bowl of a food processor, mix the sugar and flour, then add the butter and process it until it resembles coarse meal. Dribble in the egg mixture until it forms clumps. Remove from food processor and gather the dough into a ball. Flatten it out a little into a disk or square, wrap in plastic and place in the refrigerator for an hour to chill. Take the dough out after an hour and press into a rough circle or square, and place into an 11 inch tart pan with a removable bottom. I used a square 9 inch pan. This dough is very soft, and I found that if I rolled it out a little onto a parchment paper, and then very carefully placed the pan over top, then slid a spatula under the parchment paper and flipped the dough into the pan, it was easier to do. Make sure that the dough is pressed evenly up the sides as well. You can do all this a day in advance. Keep it chilled however.
Filling
  1. Preheat oven to 375 degrees and position the rack in the lower third of the oven. Blend almond paste, sugar and flour in bowl of food processor until fully mixed. Add the eggs and vanilla extract. Peel and slice pears, and place the in a fan pattern over the base dough. (I have a bit of a red face here, I forgot to add the butter and poured the filling over the sliced pears and didn't discover the missing butter until cleanup. It tasted great by the way.) Pour the filling over the pears and back in a 375 degree oven about 50 minutes or until the pears are tender and the crust is browned. Cool 30 minutes and then remove from pan. Serve warm or at room temperature with a little whipped cream.
Created using The Recipes Generator

Continue Reading
No comments
Share:

Saturday, September 16, 2017

Hurricane Irma Chicken and Rice Soup for #SoupSaturdaySwappers

I had plans to make a great soup I used to make for us from time to time, but Hurricane Irma blew that plan out the window, and made me rethink.  

This month's theme for Soup Saturday Swappers is Quick Weeknight Soup, but because we had a hurricane in our part of the world and were without power for a couple of days, I wasn't sure I'd be able to participate. But I pulled a few things from the freezer and made up a soup.
Hurricane Irma Chicken and Rice Soup for #Soupsaturdayswappers

Amy of Amy's Cooking Adventures is our hostess this month and I think this would be just about perfect for any busy household for a quick and tasty soup.
BTW-  Soup Saturday Swappers is a great group of bloggers who get together once a month, the third Saturday to be exact, and post a soup they made.  Wendy Klik of A Day in the Life on the Farm started it.  There's a theme and a hostess for every month and we all make a soup to go with the theme. Last month it was Copycat soups and I made my version of Zuppa Toscana and it was so good.  
But this month, the theme is Quick Weeknight Soups and this was a quick one, and I gotta keep saying it, totally delicious.
I'm calling it Hurricane Irma Chicken and Rice Soup.
And actually I think this would also be great for any quick weeknight soup as it depends on odds and ends from the freezer.
I had a little chicken, some Mexican Rice, some chopped Tomatoes and some pork stock in the freezer along with some frozen jalapenos, and then I dolloped it with a little creme fraiche, cause I had some in the fridge. 
And you know what, it all tasted pretty darn good, when I combined it. 
The broth was rich and tasty, the tomatoes added some umami, the rice and jalapeno's added a little 'piquant' and honestly, I'm going to make it again and again.

Yield: 2-4 servings

Hurricane Irma Chicken and Rice Soup

prep time: 5 MINScook time: 20 MINStotal time: 25 mins
This soup is a quick,easy and delicious soup for those busy weeknights. And best of all, it's great for lunches as well. Customize it to your heat level and use up leftover frozen rice, chicken, tomatoes and chiles.

INGREDIENTS:


  • 6 cups pork, chicken, beef or vegetable stock - I used unsalted Pork stock from my freezer
  • 1 cup cooked chicken, cut into dice (leftover rotisserie chicken is great here) from the freezer
  • 1 tomato chopped fine (or 1 cup frozen chopped tomatoes)
  • 1-1 1/2 cups prepared Mexican rice (I used some from the freezer)
  • 1 jalapeno, chopped
  • 1/2 - 1 tsp. Cumin
  • 1 teaspoon creme fraiche per serving, optional

INSTRUCTIONS:


  1. Thaw and heat the stock, add the chopped jalapeno, let cook for 5 minutes, then add the tomato, let simmer 5 minutes, add the chicken and rice and heat through, let it cook for an additional 5 minutes or so. Taste and add the cumin, 1/2-1 tsp, to your taste. To serve ladle it into a bowl, and top with a teaspoon of creme fraiche if desired. Enjoy.
Created using The Recipes Generator

Continue Reading
17 comments
Share:

Friday, September 15, 2017

Grilled Fish Taco's for #FishFridayFoodies

I made it, I made it!!!!!  Got my Grilled Fish Taco's made for #FishFridayFoodies.

I wasn't sure I was going to be able to make this post, we had a little bit of a hurricane go by us a few days ago and we were without power for awhile, luckily for us Irma just brushed on by.
Big shout out to Duke Energy, they were awesome, and got us power faster than I thought they'd be able to.
Luckily for me I'm married to Biker Nerd and he got our generator up and running, hooked up the fridge and freezer to it, and kept it all cold.  Most importantly he got the generator going in time to make coffee.
Hey, if you're faced with cold showers, no water and no power, you need a hot cup of coffee, you do.
I'm really happy he knows how to do all that. (actually we did have water, lots and lots of water)
Coffee is very important.
All that being said, since he was able to keep the cold going for the freezer, it meant that the piece of Dover Sole I had in the freezer was still good, and I could go ahead and play with it for this month's theme of Grilled Fish for Fish Friday Foodies.
Honestly, I wasn't too sure what I was going to make.  I'm the fish/seafood eater in this family, and since the only grill I have is a George Forman, it took a little thought.
About 2 am, Tuesday, I figured it out.  I decided to make a Fish Taco.  It was Taco Tuesday after all.
A few years back I used to get fish taco's in Malibu and I loved them, fast forward a few years, I went to a restaurant that served grilled fish taco's with mango sauce, and I'd order that when we went there.
You get where I'm going with this, right?
Grilled Fish  Taco's with Mango Salsa.
I made this as a meal, but I'm thinking that these might make an appearance at a Tapas Night as well.
Our hostess this month is  Wendy of A Day in the Life on The Farm, who also happens to be the originator of this fun gathering.  If you want to join in on the fun you can email her at  wendyklik1517@gmail.com with your blog url and she'll add you to this fun bunch of bloggers. 


Yield: 2 Servings

Grilled Fish Tacos for Fish Friday Foodies with Mango Sauce and Coleslaw

prep time: 15 MINScook time: 10 MINStotal time: 25 mins
These grilled fish taco's make an excellent lunch, dinner or even appetizer, depending on the size of the tortilla.

INGREDIENTS:

Grilled Fish Tacos with coleslaw and mango sauce
  • 2 - 4 oz. pieces of Fish, I used Dover Sole
  • Coleslaw
  • Mango Sauce
  • 2 flour tortillas - burrito size
  • 1 teaspoon butter
Coleslaw
  • 1 cup finely shredded cabbage
  • 1 small carrot grated fine
  • 2 teaspoons rice wine vinegar
  • 1 teaspoon sugar
  • 1 teaspoon Extra Virgin Olive Oil
  • 1/2 teaspoon celery seeds
Mango Sauce
  • 1/2- 1 cup frozen mangos, chopped
  • 1/2 finely minced jalapeno
  • 1/2 teaspoon rice wine vinegar
  • 1/2 teaspoon sugar

INSTRUCTIONS:


  1. Prepare the coleslaw and Mango sauce and set aside. Heat the grill up, whether using a George Forman or gas or charcoal. Prepare the fish by brushing it with a little olive oil on both sides and sprinkle a little Blackened Seasoning on one side. Grill the fish til just done and the fish flakes easily, about 3-4 minutes.(my sole was very thin). Remove to a warm platter. Take one of the flour tortillas, and place on the grill to brown and soften for about 30-45 seconds. Add a little mango salsa on one side of the tortilla, place cooked fish on top of the salsa and top with a little coleslaw. Add another tablespoon of the mango salsa, fold over and serve. This is a crunchy, tangy fish taco.
  2. For the Mango Salsa: Chop the mango very fine, mix with the finely chopped jalapeno and add the rice wine vinegar and sugar. Set aside while you prepare the coleslaw.
  3. For the coleslaw: Slice the cabbage so that it is very finely chopped. Peel and grate the carrot, and shred finely. Add the rice wine vinegar, sugar and celery seeds, toss together and set aside while you prepare the fish.
Created using The Recipes Generator

Continue Reading
11 comments
Share:

Wednesday, September 6, 2017

Warm Potato Salad ( Varm kartoffelsalat)

I got an invite to a friends' house for Brat's and Sauerkraut the other day.  And of course I had to bring something, cause that's just what you do.   At any rate I was going to make and bring some Potato Rosti, as I thought it would go well with Brats, but then I was asked to bring a hot potato salad.
My mind immediately flew to the one my mom used to make, but I'd never made it.  So I got onto a Facebook group I started called Dansk Mad og Opskrifter (Danish Food and Recipes) and asked the members for a recipe.  They came through with lots of different recipes, and they were all great, but then my cousin Solvejg posted her recipe, and when I looked at it, I knew it was very similar if not almost identical to the one my mom made.
Warm Potato Salad (Varm kartoffelsalat)
So I made it, and everyone liked it, including me.

Which is very important because that meant I had to share the recipe, I had to.   The saute'd onions.
 Adding the bacon, before adding the potatoes
Warm Potato Salad (Varm kartoffelsalat)
 And finally adding the potatoes.  Although I think next time I make this, I'm not going to bother peeling the potatoes. I like them with the skin on.


Yield: 6-8 servings

Warm Potato Salad (Varm kartoffelsalat)

prep time: 10 MINScook time: 25 MINStotal time: 35 mins
This is a delightful change from regular potato salad and goes so well, not only with Brats and Sauerkraut, but also with Hamburgers and hot dogs, not to mention various grilled meats./

INGREDIENTS:


  • 2 lb. Red Potatoes or a similar waxy potato, cooked, peeled and sliced (peeling them is optional)
  • 2 onions, cut in half and then into strips
  • 4 tablespoons butter (could also use bacon fat if desired)
  • 1/2 cup cooked, chopped bacon
  • 3 tablespoons white vinegar
  • 3 tablespoons rice wine vinegar
  • 1-1/2 teaspoon sugar
  • 1/4 cup chopped chives or parsley
  • 1/4-1/2 teaspoon fresh ground pepper, to taste

INSTRUCTIONS:


  1. Peel onions, then cut in half and from there into strips. Set aside. Cook potatoes til just done, drain and let them sit for a couple of minutes. Saute the onions in the butter until the onions are translucent and just done. Peel the potatoes, and cut into slices, add to pan with the onions in it, along with the cooked and chopped bacon and stir gently together, being careful not to break up the potatoes. Whisk the vinegars and sugar together. Pour over the potatoes, onion and bacon mixture and add the freshly ground pepper. Heat together for just a couple of minutes. Take off the heat and sprinkle with the chopped chives or parsley and serve warm.
Created using The Recipes Generator

Continue Reading
No comments
Share: