It's time for Baking Bloggers again.
I haven't been participating in very many blogging events this past few months, but when I saw the theme for December, the little thinking cap hovered over my head and I got an idea.
The theme this month is Baked Party Appetizers. And it also happens to be the last of Baking Bloggers cause it's been retired. Something new will be happening in January though. Stay tuned.
OK, so I got this idea cause I have a small wheel of Brie Cheese in the fridge that's been giving me the 'eye' lately.
I bought it last month, and kept meaning to eat it, sliced on some good bread or with some crackers, but it's still sitting there, staring at me everytime I open the cheese drawer. And I got tired of those looks I was getting.
So I elected to make some Gougeres using the Brie.
I love Pâte à Choux pastry anyway, and honestly, I think it's about the most versatile recipe any cook should learn how to make. I use the recipe I cut out of the paper back in the '80's which is Julia Child's base recipe.
You can use the base for sweet or savory, heck, you can even make it gluten free. I've done it, and they were good.
I did go here for inspiration for these, and have to say the my high school french came in handy as well.
And I made a couple of modifications as well, cause gee, I'm the baker here.
I used Swiss cheese cause it was all I could find in our local grocery store. And really, the slightly nutty taste of the Swiss cheese married very well with my Brie.
Now Brie cheese is very soft, or at least it is if you leave it out at room temp to ripen, it becomes very soft. However, I decided to try 'stuffing' my gougere with little cubes of cold brie.
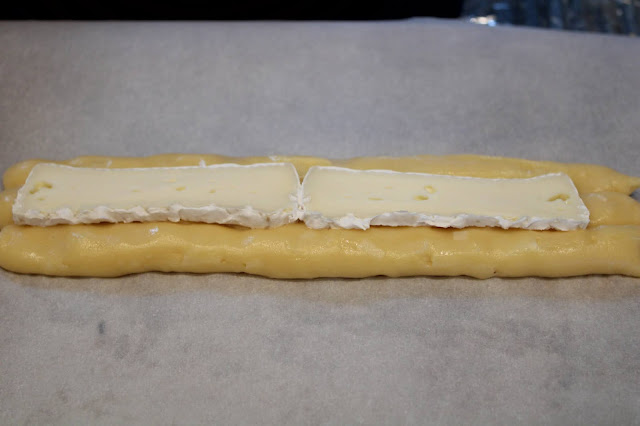
Let me show you how I cut it. I don't remember exactly where I saw this for the first time, but can I just say this, 'IT'S BRILLIANT', and guess what, it also works great for cutting layer cakes as well. Of course I'm the usually the one who actually scrapes the frosting off the cake before eating. But when you cut the cake or in my case the wheel of brie, you get a more equitable distribution of the rind per slice. In the case of a cake, you have the two ends with frosting, for the people who 'must have lots of frosting', and those who want cake with a little frosting. Use your imagination here, cause I'm just showing how to cut the brie. OOOH, that might not have come out right. 'wink'.
I did cut off the ends where there was a lot of rind, but I ate the cheese inside. I'm not fond of the rind, but I will eat it,and was wishing I still had my Mauli dog who loved the rind. She loved it when I bought Brie, cause I'd cut off the rind and feed it to her.
Whenever possible one should share food with a loved one or ones.
Here's a few pictures of the process, and my cohort in eating more than our fair share.
and
and
and
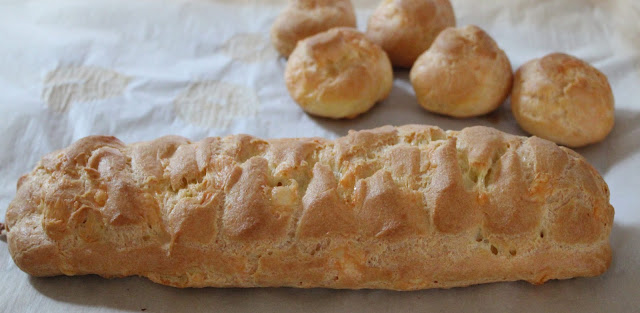
Had a lot of choux dough so thought I would play, a little more. So I piped out a base, and then placed some slices of the Brie on top of it.
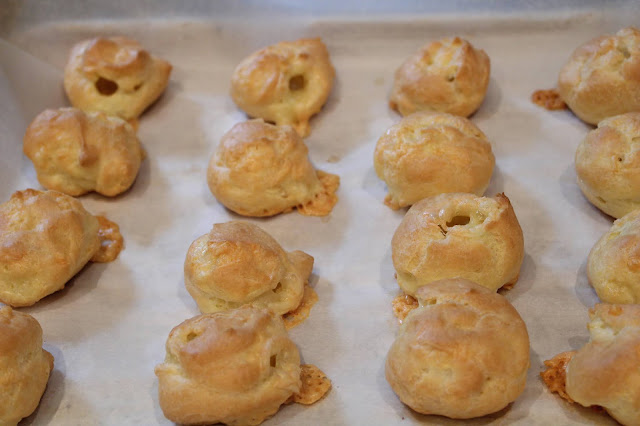
After the bake, and it's ready to cut and enjoy.
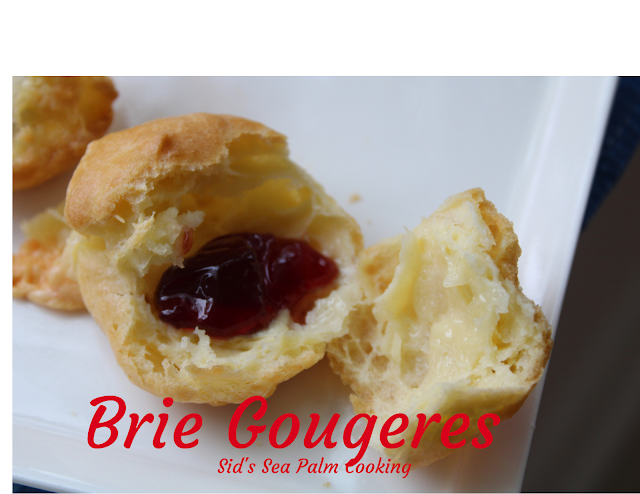
Baked Brie Gougeres with a dab of Red Currant Jelly
Baked Brie Gougeres, see the lovely melty Brie cheese inside.
Miss First enjoying her Brie Gougere topped with a dab of Red Currant Jelly. She loves her melty cheese, she also has a bit of a sweet tooth, so this hit both her happy points.
You can see the concentration here, as she eats her treat.

Brie Gougeres
Ingredients
- 1 cup water
- 6 tablespoons unsalted butter, cut into pieces
- 1/2 tsp. salt
- 1 cup flour, all purpose, scooped out and leveled.
- 1 cup eggs, (stirred together with a fork and measured into the cup, about 4-5 large eggs)
- 2 oz. Camembert Cheese, cut into small pieces - look at the picture.
- 4oz. Swiss Cheese - grated
Instructions
- Preheat oven 425 degrees.
- Heat water and butter together, bring to a boil. Take off of heat and dump the flour in and begin to beat it together. It will be rather lumpy at first but keep beating vigorously. It does come together. Keep beating it until it forms a large ball, then place back on medium heat and keep beating it, until it stays together and leaves a thin film of dough on the bottom of the pan. This tells you that a lot of moisture has evaporated, and it will accept more of the egg. Take off of the heat now. Add about 1/4 of the eggs to the dough and beat together. It will look very strange at this point, cause it separates and looks rather nasty, but keep beating and as soon as the egg has incorporated into the dough, dribble a little more in, and work your arm vigorously again, beating the egg in. (at this point you can use a mixer bowl and beat it in with that, but I don't like the dough as well when it is done this way, I find it softens it too much, but then again, if you can't beat the egg in by hand, use your KitchenAid, but dribble the egg in a very little bit at a time). Add the egg, a dribble at a time, beating vigorously with each addition. As soon as the egg is incorporated, add the grated Swiss cheese and combine. If the humidity is high, you may not need all the eggs, but if it's dry you will. I've been making this for many years and can tell from the feel of the dough if I need all the eggs or not. The pastry should just hold its shape when lifted with a spoon.
- Now, you're ready to bake your cream puffs. You can spoon them onto a lightly greased baking sheet or parchment covered baking sheet. My personal preference is for Parchment paper, but then again, it's up to you. I pipe the pastry onto the sheet, filling a piping bag with the dough, and cutting a hole in the bag. Pipe a small amount of the choux paste onto the parchment paper and then place a small piece of the Brie on top, pushing it in a little. Pipe another circle of choux paste on top, and using a wet finger (I kept a cup of water beside me for this step), seal the top and bottom of the dough together. Space them about an inch apart on the baking sheet. They will not spread, but will instead puff upwards as they bake.
DO NOT open the oven to check the progress of the bake, you'll just doom those little puffs of golden deliciousness to a flattened doom. Instead, turn the light on in the oven and watch through the glass door. They are done when they are a lovely golden brown color. And if you have trouble seeing the color through the door, you probably need to clean the glass off.
Baking Bloggers December 2021
Baked Party Appetizers
- Brie Gougere from Sid's Sea Palm Cooking
- Cheddar Cheese and Pecan Crisps from Karen's Kitchen Stories
- Cheesy White Sauce Chicken Buns from Sneha’s Recipe
- Crescent Roll Samosa Wreath from Magical Ingredients
- Mini Christmas Cakes from Small Batch Baking Kitchen
- Monte Cristo Puffs from Palatable Pastime
- Pigs In A Blanket Christmas Wreath from Making Miracles
- Shrimp and Pork Roll Lettuce Cups from A Day in the Life on the Farm


